Friday, July 28, 2017

How To Make Watermelon Jelly - Getting Off The Grid


I have to say that this is the year of experimenting with home canning new jams and jellies and when I mentioned the jalapeno jelly I made an online friend (@Ithink) mentioned watermelon jelly so I had to jump on this one and I asked for the recipe.

Click here for : The jalapeno jelly recipe 

She gave the the recipe and I looked up the time needed to use the water bath canning method and I learned a little more about home canning watermelon jelly, its good to do your homework, be in the know of how things work, the good and bad. I did alter the recipe just a little but its the same flavor, watermelon. (I added more lemon juice)

Since watermelon is so low on the acid scale some say that its not safe to home can but when you add lemon juice you make it safe to home can, so make sure to put the lemon juice in the recipe! As well as the exact amount of sugar.


First always : Wash and sterilize your half pint jars, prepare water bath canner with hot water.

You will need : 


8 cups of watermelon - cut into chunked with no seed

1/2 cup lemon juice

4 cups of sugar

2 boxes of sure-jel No sugar/low sugar fruit pectin


Now lets make Jelly!


In a blender or food processor add the watermelon and  process till puree. 


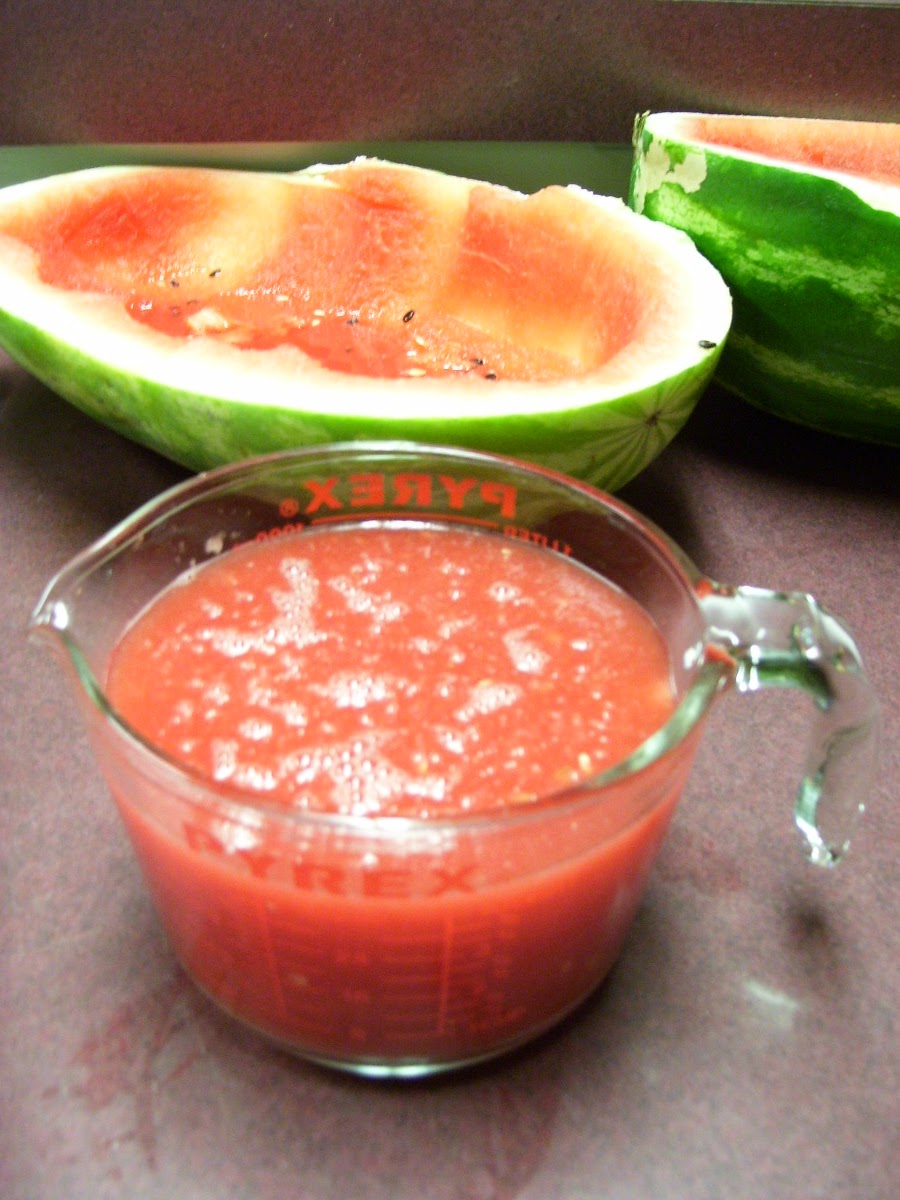
Measure out 4 cups of the puree and put into the cooking pot.

Measure out the lemon juice and add to the watermelon puree.

In a small bowl mix the fruit pectin with 1/2 cup of sugar, set aside.

Measure 3 1/2 cups of sugar into a large bowl, set aside.

Bring watermelon puree to a boil over medium high heat.

Add the fruit pectin and sugar mixture and bring to a rolling boil that cannot be stirred down, cook for two minutes. 

Add the rest of the sugar and stir until dissolved and bring to another hard boil that cannot be stirred down, cook 3 minutes.

Remove from heat and ladle into half pint jars. 

Wipe rims of jars with a clean wet cloth, apply lids.

Cook in a water bath for 7 minutes.

Remove from water bath and place on a clean towel to cool.


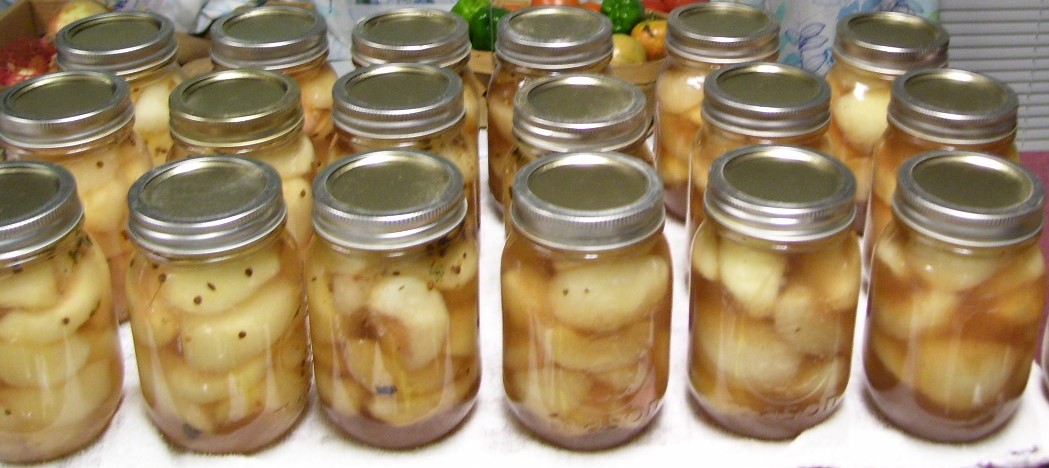
Makes seven half pints. Store in a cool dark place. 


This watermelon jelly taste wonderful as it was, hot, So I know after it had been refrigerated it will be even better. 

NOTE : There is absolutely no way to get every tiny white seed out but they are not hard and can be eaten. 


By Andria Perry
Photos By Andria Perry

Thursday, July 27, 2017

How To Make Jalapeno Jelly - Getting Off The Grid


I absolutely fell in love with this jelly when I had a taste at a anniversary party many years ago but every year when the jalapeno peppers were producing I always forgot to make this jelly to enjoy at home for myself. 

Well, not this year! My pepper plants are not at the full harvest time so when I seen these large beautiful jalapeno peppers at Aldi grocery store I grabbed a couple 8 ounce bags for very little money.

I love the taste, its unique. Its tangy and sweet with just a hint of heat from the peppers.

Lets Make Jalapeno Jelly!

First - I have to say jalapeno pepper are hot so precautions need to be taken. Do not touch the peppers with your hands while removing the seeds and the white flesh from inside, use gloves if possible. I used a fork and knife being care not to touch any of the pepper.


What you will need to make Jalapeno jelly:

12 ounces of medium to large jalapeno peppers - sliced in half, no seeds and no white flesh.

2 cups of apple cider vinegar 

6 cups of sugar

2 pouches of Ball liquid fruit pectin

A few drip of green food color (optional)

Measure your sugar and set aside in a large bowl.

Remove the liquid pectin from the pouches into a cup, set aside.

In a food processor pulse the jalapeno peppers with 1 cup of the apple cider until blended but still has small pieces. 

Measure the jalapeno mixture and add more apple cider vinegar (one cup) to make 3 cups total. 

In a large pot add the jalapeno mixture and bring to a boil and simmer for 15 minutes.

Add sugar and bring to a rolling boil that cannot be stirred down.

Add pectin and bring to a rolling boil that cannot be stirred down and boil one minute.

Remove from heat and skim off foam if needed. 

Fill prepared half pint canning jars leaving 1/2 inch head space. 

Wipe rims clean and apply lids.

Process in a water bath for 10 minutes. 

Makes 8 half pint jars.


NOTE : If you want smooth jelly do not process a lot and run through a cheese cloth to remove pieces. However, I find a few small pieces makes the jelly more interesting.

Serving suggestions :

On a larger serving plate put a bar of cream cheese, allow to soften at room temperature. Pour a half pint of jalapeno pepper jelly over the top and allow to run over the sides. Arrange crackers around the cream cheese and jelly.

I also think jalapeno jelly will make a wonderful glaze for pork or baked chicken.

I hope you enjoy your jalapeno jelly and look forward to more delicious jams and jellies from my homestead.

By Andria Perry

Photos By Andria Perry

Wednesday, July 26, 2017

Getting Off The Grid - When Its Hot Its Hot!

July 26, 2017


Life in July. Life in July in Alabama. Well, I could say typical July but this year has been anything but typical in every aspect. But as far as July in Alabama goes its hot and humid and my favorite time of the year.

What is going on around the homestead? 

The okra, what survived the wet months, has began to produce more and I am now getting a couple meals each week, that is small meals for two people.

I have one nice eggplant and the plant is blooming, I will pick this one today.


The tomatoes that was set out a couple weeks ago are now blooming as well as the new bell pepper plants. As for the older bell pepper plants I picked all of them so that they would bloom again and they are.

The few cucumber vines that I have are doing great. I am beginning to get more each day but I am not home canning them this year, I am eating them, in many cold dishes so not to have to cook each meal.


The sunflowers are small, except a few so I am not so sure about getting any seeds this year, but its a beginning to learning about how to grow them and care for them.


The may pops (passion flowers) I dug up and put into flower pots on the porch are blooming! I love the flowers but if I get to grow my own in pots means I can harvest the seed pods on time and not have to out to the woods to check them.

 It is time to start harvesting more sage, I try to do a massive picking once a month. By doing it once a month it has time to grow more leaves and to get some size on them. 

The basil is slow growing and I cannot understand, I need to learn more about basil. 


The Stockpile

About the only thing, from my garden, I have been able to put away for later has been the bell peppers, I will chop them and freeze but I did home can a few jars, (four) of pepper steak using many of the bell peppers. 

Yesterday I made Jalapeno jelly, I have wanted to make this for years so I finally did but most of the jalapenos were store bought. However, they were not costly and I do have what I have been wanting. It made eight half pints.


Last week I did manage to buy mushroom for .69 per container so I home canned seven pints.

For More about Mushroom click here : How to Home can mushrooms

I also took count of how much food I have in stock and I counted 789 jars with 140 being just veggies. I added to that by 15 jars this week for a total of 804 fruits, vegetables, meats, soups etc. and jams/jellies/pickles and relishes.


What is happening on your homestead? 


By Andria Perry
Photos By Andria Perry


Saturday, July 15, 2017

Getting Off The Grid - Life On The Homestead


July 15, 2017

The good and the bad, no one said life was easy.

The Bad :

Things change and they can change in a blink of the eye. Sure we make plans to live the best life we know how but then when life throws you a curve ball and it was totally unexpected, things change and sometimes never go back to the way they were.

That is kind of what has happened here. Things happened.

First a mild winter and a rainy Spring and Summer and that means bugs, bugs and more bugs. 

I lost crops that was going to be food for the winter.

The grass and/or weeds took over the bottom field, so much rain I could not keep up with it. 

Next the riding mower broke down and I just did like I always have, push mowed, but never made it to the bottom field so its four feet tall. I worked so hard in the garden and mowing I totally exhausted myself, so much so I stayed in bed a whole day and slept 16 hours. 

I am completely defeated, tired to the bone.

What is funny is people were shocked to hear me admit defeat, they said " I have never heard you give up on anything!" Well there is a first time for everything. I just cannot do everything with nothing. I refuse to mow anything but around the house until I get a new mower, and I plan to this week. 


The Good :

While I gave up the upkeep of the property I never gave up on providing for myself, even with cost.

I bought more peaches and I made more peach products  and I hope they will last for a good long time. 


I made a different Peach jelly/jam, sliced peaches in light syrup and a few more jars of whole pickled peaches.


And I made three pints and one half pint of tomato sauce. As I get the tomatoes I process ( home can) what we do not eat, I try not to waste any.


Another wonderful thing is the tomato seed Tony had sowed in a flower pot outside got big enough to be planted in the garden on Monday and the bell pepper plants I had sowed from seed got put into the ground on Wednesday. 

What I did was I took up the wire cages from the tomatoes that were dead or already had all the tomatoes it could bare and was no longer flowering, I mowed them down. In those spaces Tony planted more tomatoes and I replaced the wire cages for each plant.

I am beginning to get okra and I made a meal of fried okra and green tomatoes one evening. I am also getting cucumbers, not many but enough to feed us a couple daily. 

For how to home can peaches click here :  Pickled peaches and Jelly  

After thoughts :

Although I had planned things so well, that I would be off the grid with solar power, well water, a root cellar and a large greenhouse things just are not happening, I am in limbo and I cannot make these decisions at all because of the unknown, that little curve ball is still in motion. I do know one thing about me and that is without proper tools I cannot and will not be able to handle this place alone.

So I must invest to reap the benefits. We`ll see how thing are in one month and maybe then I will know what will take place and what will not. 

By Andria Perry
Photos by Andria Perry

Wednesday, July 12, 2017

Getting Off The Grid - Pickled Peaches and Peach Jelly

July 12, 2017

This year was not a good year for the peach crops in Alabama, most of the peach farms were low to no peaches and the lucky ones did have a hefty price tag. No matter how much this household loves peaches I will not pay that inflated price for my states peaches. So I shopped Aldi`s grocery store and got my peaches shipping in from California for the low price of .99 per pound. I home canned several wonderful peach products for us to enjoy for the next twelve months, Pickled peaches and peach jelly are two I will talk about today. 

Home canning peaches is an easy canning job. Most people scold off the peelings but I prefer to do things differently, to get the most out of the fruits, I hand peel! By hand peeling I can get one more peach product from the fruit, with no waste, plus scolding is a harder way in my opinion. 


What do I do with the peelings? I make jelly! After all there is a lot of flavor in the peels and you also have that tiny amount of peach still on the peel when you do it by hand. 

Most of the time I work with five to ten pounds of fruit at a time so not to be overwhelmed.


Peach Jelly

How And What to do :

First of all, I always wash and sterilize my jars and get the lid and rings ready before I do anything. Next I make sure I have hot water waiting in the canner, whether water bath or pressure canner.

Wash the peaches in cold water, making sure that the fuzzy is all gone. 

Next I peel the peaches, putting peels into one large cooking pot and the peach into another large vessel, bowl or cooking pot, with cold water and fruit fresh to keep them from turning brown.

When I get them all peeled I cook the peelings over medium heat, just covering them with water and stirring every now and then. When the peel looks light brown in color and the juice is a reddish color they are done. Strain off the peels and use the juice to make your jelly. 

Using the Ball liquid pectin, I just follow the directions for plum jelly. 

BUT where the recipe states it makes 5 half pints I got 9 half pints, so have your jars and lids ready, just in case.

Store jelly in a cool space til used. 


Pickled Peaches

This was always a favorite on the holiday dinner table when I was a child and the recipe was passed down to me from wonderful cooks dating back to around early 1900`s. They are tangy from the vinegar and sweet from the sugar, with that spicy taste from the cloves and pickling spices. 


I made a mixture of sliced pickled peaches and whole pickled peaches, both are delicious just the same but the sliced cooks faster.

How to home can pickle peaches :

You will need : 

Pint and/ or quart  home canning jars

Lids and rings for each jar

2 1/2 cups of white vinegar

2 1/2 cups of white sugar

3 tablespoons of pickling spices

1 tablespoon of whole cloves (I used ground cloves, this will make the liquid dark)


Peel peaches and set them aside in cold water with fruit fresh.

In a large cooking pot add the vinegar, sugar and spices and bring to a boil.

Drain the water and fruit fresh from the peaches.

Add peaches to the hot liquid carefully and cook till a fork inserts easily into the peach. 

Remove from the heat and fill jars to 1/2 head space.

Wipe rims of jars clean and apply lids.

Process 30 minutes in a water bath. 

Store in a cool place. 

NOTE : peach colors vary, some are white and some are deep yellow. Its just different type of peaches but the taste are the same.


By Andria Perry
Photos By Andria Perry


Sunday, July 9, 2017

Getting Off The Grid - How To Home Can Or Freeze Sweet Potatoes


July 9, 2017

While I would have loved to grown all of my food this year I have not, mother nature allowed to much rain and some of my crops died. Since I am okay money wise ( still working full time) I am buying a little from the farmers market and home canning or freezing, while I prefer home canning since it cost money/ power to run a deep freezer.

As I mentioned in my last article I bought a box of sweet potatoes, a 20 pound box and the freezer is low of sweet potatoes, Plus this year since I have the pressure canner I home canned more than I froze.


First I always wash and sterilize my jars and get the lid and rings ready before I do anything. Next I make sure I have hot water waiting in the pressure canner.


How to home can sweet potatoes :

Make light syrup using 2 1/4 cups sugar and 5 1/4 water = 6 1/2 cups, set aside on low heat.

Peel the sweet potatoes and rinse in cold water. Cube sweet potatoes in medium size chunks. 

In a large cooking pot fill 1/2 full with water, bring to a boil. Add sweet potatoes and bring back to a boil, boil 10 minutes. 

Remove sweet potatoes from boiling water using a slotted spoon, put directly into pint jars. Fill jars with the light syrup, wipe the rim of jars with a clean damp cloth and apply lids.

Put 7 filled pint jars into the pressure canner and process for 65 minutes.

That is how to home can sweet potatoes in light syrup.


How to freeze mashed sweet potatoes : 

I have learned that you always, I mean always cook th sweet potatoes first. Why? When you cook a potato that has not been Pre-cooked its grainy / woody texture that is not any good.

For Mashed sweet potatoes - Peel and cube sweet potatoes as small as you can cube them, put them into a large cooking pot and just barely cover them with water, boil till soft, there should not be much water left, cook till most all is gone, stirring often.

Remove from heat and pour into a stainer and back into the cooking pot. Add 2 tablespoons of lemon juice, mix well. 

Allow to cool completely.

Make appropriate size meals and spoon into a freezer bag, label and freeze. Enjoy sweet potatoes for six months or more. 

Just thaw in the freezer bag when ready to eat, season as you like.

Freezing whole sweet potatoes :

Wash the sweet potatoes to get rid of any dirt. Bake sweet potatoes till done. 

Cool completely.

Fill freezer bags with the sweet potatoes and freeze. its that simple, when you want a baked sweet potatoes take out what you need and reseal the rest.


Sweet potato pie 

To make sweet potato pie filling just remove a quart freezer bag of mashed sweet potatoes, thaw. 

Add 2 eggs, 1/4 cup of milk, 1/2 cup of sugar and 1 tablespoon of vanilla flavor. Mix well.

Pour into a 9 inch pie crust and bake for about 45 minutes or till golden brown around the edges. 

That is how I use sweet potatoes as a stock up for the homestead.

By Andria Perry
Photos By Andria Perry


Thursday, July 6, 2017

Getting Off The Grid - Farmers Market And Gardening


July 6, 2017 

I have this dream of getting off the grid and growing all my own food, even hunting if need be, but more than likely I will be a 100% vegetarian. A few years passed and I learned the hard lesson that sometimes you cannot grow your own food, mother nature just will not cooperate! 

This year we are blessed with rain, sometimes to much, but with the mild Winter that central Alabama had was not good because the pests are out early and attacking everything in its path. I lost a couple fruit trees and a few crops, zucchini, yellow squash and half of the tomato plants.

With no peaches I began to call the peach farmers around Alabama only to find out they were also hit hard and had few peaches and they have a hefty price on them! 


Next I drove 45 minutes away to the Alabama farmers market to see what they had that I could use to stockpile. 


The only food I seen that I could actually stock up on at a good price was sweet potatoes, so I bought a 20 pound box for $10. When I got home I took them all out of the box to make sure none was beginning to rot and all of them were perfect and I counted 51 sweet potatoes and that averages out to .19 for each potato. 


I worked in the evenings on canning and freezing the sweet potatoes. And as always I baked a couple for dinner after smelling the sweet potatoes cooking, I could not resist.


The first night - July fourth, I home canned 7 pints and made two quarts of mashed sweet potatoes for pies.


Night Two - July fifth, I home canned 7 more pints and I baked 12 sweet potatoes and froze those.
So all together I got 14 pint jars of sweet potatoes in light syrup, 2 quarts freezer bags of mashed sweet potatoes for that fast pie and 12 baked sweet potatoes for a quick out of the freezer dinner when needed. Over the several days I had the box in the house we had 3 baked sweet potatoes one night for dinner and 2 deserts made with them.

 For a total of 33 meals with sweet potatoes. And that averages out to around .30 per cooked sweet potato serving. Not to bad in my book. 

Do you love`em or hate`em? Sweet potatoes that is.

Note : Yes I know syrup is misspelled :)

By Andria Perry
Photos by Andria Perry